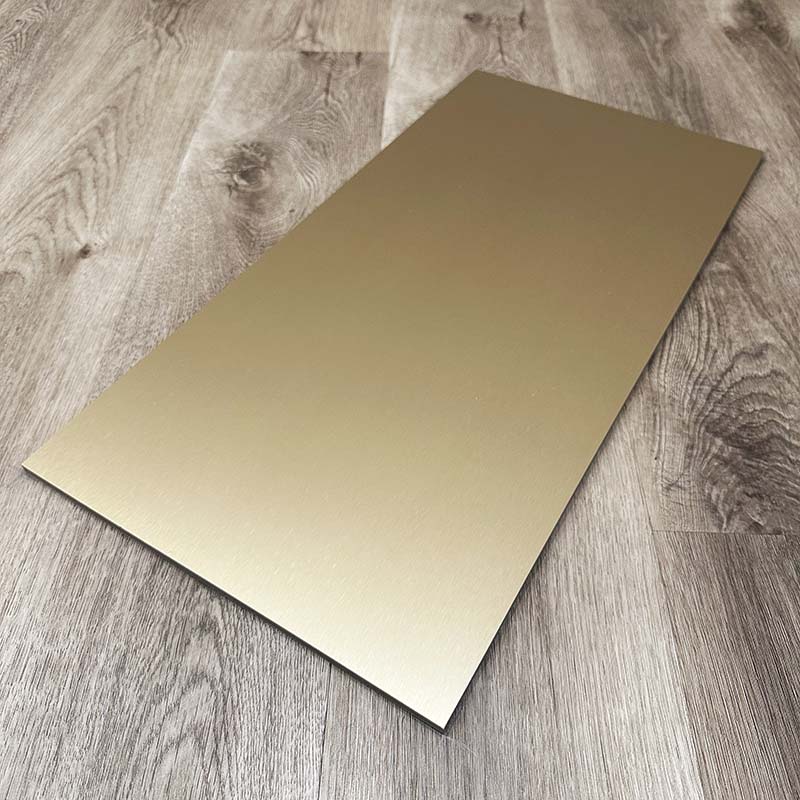
The primary friction point in adopting a carbon crystal board for large-scale projects is installation waste caused by surface chipping. Installers often blame the material when edges splinter during fabrication. The reality is quite different. Chipping is not a material defect. It usually results from tool mismatch and improper feed rates. You are cutting through a dense composite core and a delicate decorative film simultaneously. If you treat this hybrid material like standard plywood, you will destroy the finished edge.
We established this guide as an evidence-based framework for contractors and fabricators. You need predictable, repeatable methods to achieve factory-grade cuts on-site. Precision cutting minimizes material loss and protects project margins. In this article, you will learn the mechanics behind blade selection, surface preparation, and board orientation. We will also detail specific techniques for handling specialized finishes. Mastering these steps ensures you deliver flawless installations without excessive waste.
Key Takeaways
Tool Selection is Non-Negotiable: Achieving a clean edge requires a high-tooth-count (TPI) carbide-tipped blade specifically designed for composites or plastics.
Surface Preparation Matters: Applying masking tape over the cut line reduces surface tension and prevents the decorative film from splintering.
Orientation Dictates Quality: The board must be oriented face-up or face-down depending on the saw's blade rotation to ensure the teeth cut into the decorative face, not out of it.
Specialty Finishes Require Slower Feed Rates: High-end variants, such as the Metal Texture Carbon Crystal Wall Panel, are highly susceptible to friction heat and require controlled, consistent cutting speeds.
The Business Cost of Chipping: Why Carbon Crystal Boards Splinter
To cut a Carbon Crystal Board successfully, you must understand its composition. Manufacturers engineer these panels using a multi-layered material matrix. The core consists of bamboo or wood fibers mixed with PVC resins and carbon powder. This creates a dense, rigid substrate. During production, factories heat-press a decorative PVC or PET film onto this core. This top layer provides the aesthetic finish, but it behaves differently under stress than the core underneath.
A tear-out happens due to conflicting physical forces. When a saw blade spins, its teeth aggressively remove material. Chipping occurs when the upward or downward force of a saw blade exceeds the adhesive strength of the surface film. The blade teeth catch the edge of the delicate film. They lift it away from the carbon powder substrate before shearing it. Because the film is rigid, it snaps and splinters rather than stretching. You see this as a jagged, ruined edge along your cut line.
This mechanical failure carries a heavy project impact. Every miscut panel directly harms your bottom line. Installers must discard ruined sections or attempt complex salvage operations. This increases the required overage percentage you must order for the job. It extends labor hours as workers recut panels or repair edges. Ultimately, persistent chipping threatens the profit margin of the entire installation. Preventing this damage requires a shift in how you approach panel fabrication.
Evaluating Tool and Blade Configurations for Composite Panels
Your choice of blade is the single most critical factor in preventing tear-out. Standard construction blades rely on aggressive angles to rip through wood grain. They will instantly shatter a composite film. You must upgrade your equipment to handle dense plastics and laminated surfaces.
Blade Requirements (The Core Metric)
You need a high-tooth-count blade to achieve a clean shear. We recommend a minimum of 60 to 80 TPI (Teeth Per Inch) for a standard 7 ¼-inch circular saw. If you use a 10-inch table saw, upgrade to an 80+ TPI blade. More teeth mean each tooth takes a smaller "bite" of the material. This reduces the mechanical lifting force applied to the decorative film.
Tooth geometry is equally important. Look for Alternate Top Bevel (ATB) or Triple Chip Grind (TCG) configurations. TCG blades are exceptional for composite materials. They alternate between a flat clearing tooth and a chamfered roughing tooth. This geometry scores the rigid surface before removing the bulk material. It dramatically lowers the risk of micro-chipping.
Tool Shortlist (Pros & Cons)
Different tools yield different results when cutting these dense panels. Here is how common job-site tools perform.
Track Saw: This is our highest recommendation for scalability and precision. A track saw features an anti-splinter strip right on the guide rail. This strip provides zero-clearance support directly on the cut line, pressing down on the film as the blade cuts.
Table Saw: Table saws are excellent for high-volume rip cuts. However, they lack top-down surface support. You must install a zero-clearance throat plate on your table saw. This prevents bottom-edge blowout as the blade pulls material downward into the cabinet.
Utility Knife / Score-and-Snap: We do not recommend this method for full panel thickness. The composite core is simply too dense. Scoring and snapping results in unpredictable edge integrity and often ruins the panel.
Tool Type
Precision Level
Splinter Risk
Best Use Case
Track Saw
Very High
Very Low
Long, visible finish cuts on-site.
Table Saw
High
Moderate
High-volume rip cuts and repetitive sizing.
Utility Knife
Low
High
Only for superficial scoring before sawing.
Step-by-Step Implementation: The "Zero-Chip" Cutting Framework
Having the right blade is only half the solution. You must execute the cut using a controlled, mechanical process. Follow this zero-chip framework to guarantee a clean edge every time.
Step 1: The Masking Tape Method. You must bind the delicate surface fibers before the saw touches the panel. Lay a strip of high-adhesion painter's tape tightly across the intended cut line. Press it down firmly. This tape applies localized surface tension. It holds the decorative film tightly against the core while the blade teeth pass through.
Step 2: Blade Depth Calibration. Never plunge a fully extended blade through a thin composite panel. Set your blade depth carefully. The teeth should protrude no more than 1/8 to 1/4 inch below the bottom thickness of the board. Excessive depth alters the entry angle of the teeth. A steeper angle increases lifting force and guarantees tear-out.
Step 3: Board Orientation Logic. You must cut into the good face, never out of it. For circular saws and track saws, the blade rotates upward at the front. Therefore, cut with the decorative side facing down. For table saws, the blade rotates downward toward the operator. Therefore, cut with the decorative side facing up.
Step 4: Managing the Feed Rate. Push the saw with a slow, continuous feed rate. Let the blade do the work. Stopping mid-cut is a major mistake. It creates friction burns and leaves visible blade marks on the edge. Conversely, pushing too fast overwhelms the blade. It cannot clear the plastic chips fast enough, leading to heat buildup and surface splintering.
Handling Specialized Finishes: Metal Texture Carbon Crystal Wall Panel
Premium panels introduce new cutting challenges. A Metal Texture Carbon Crystal Wall Panel features a highly specialized metallic foil. These metallic finishes react poorly to aggressive machining. You must adjust your technique to protect the decorative layer.
The primary threat to metallic finishes is the friction-heat variable. Saw blades generate intense heat as they shear through dense PVC and carbon powder. If this heat transfers into the metallic foil, the film can rapidly warp. It may even melt or discolor along the edge. Once thermal deformation occurs, you cannot repair the finish.
You must adhere to strict evaluation criteria for metallic finishes. First, require a strictly continuous cutting motion. Do not pause the saw while the blade is in the material. Second, ensure your blades are perfectly clean and sharp. Check for pitch buildup before cutting. Dull blades rely on friction rather than shearing to remove material. This friction instantly damages metal-texture films.
Proper post-cut treatment is also essential. Even a perfect cut leaves rigid plastic micro-burrs along the edge. Do not pick at these with your fingers. Instead, use a fine-grit sanding block. We recommend 220-grit. Apply a light pass along the edge. Angle the sanding block slightly away from the decorative face. This motion deburrs the rigid plastic core without scratching the delicate metal texture.
Risk Mitigation: Troubleshooting Common On-Site Cutting Failures
Even with careful preparation, job-site variables can introduce errors. You need practical strategies to troubleshoot and resolve cutting failures before they ruin multiple panels.
Micro-Chipping at the End of the Cut: This often happens in the last two inches of a rip cut. It is caused by the board separating and dropping before the blade fully exits the material. The unsupported weight snaps the remaining film. Solution: Always use proper outfeed support. Clamp sacrificial backing boards underneath the panel to support the material through the entire blade exit.
Blade Wandering / Melted Edges: If your saw struggles to track straight, or the edge looks melted, your blade configuration is wrong. This is caused by using a wood-ripping blade or pushing the saw too slowly. Solution: Swap immediately to a TCG plastic/aluminum cutting blade. Adjust your feed rhythm. Find the sweet spot where the saw moves steadily without bogging down the motor.
Salvaging Chipped Edges: Mistakes happen. You need pragmatic next steps if a minor chip occurs. Do not immediately discard the panel. You can often salvage it by routing the chipped edge into an inside corner where it remains hidden. Alternatively, design your layout to cover the damaged edge with architectural J-trim or aluminum edge banding.
Conclusion
Cutting composite wall panels cleanly is entirely within your control. Achieving a flawless edge without damage is a matter of mechanical preparation, not installer luck. You must respect the material matrix and use tools designed for high-density plastics. Relying on outdated framing blades will consistently yield poor results and inflate your waste margins.
We advise project managers to take proactive steps immediately. Mandate blade upgrades for all cutting stations before installation begins. Ensure every table saw uses a zero-clearance setup. Train your crew on proper board orientation and the masking tape method. Finally, regardless of how perfect your technique becomes, always factor a standard 5-10% waste contingency into your final material orders. This protects your timeline against unforeseen layout changes and job-site accidents.
FAQ
Q: Can I cut carbon crystal board with a standard wood blade?
A: No. Standard wood blades have fewer, aggressively angled teeth designed for ripping grain. These teeth generate massive lifting force. They will immediately shatter and tear the rigid decorative film of composite boards. You must use a high-TPI carbide blade designed for plastics or composites.
Q: Do I need a wet saw to control heat and dust?
A: No. While friction and heat are valid concerns, a wet saw is unnecessary and messy. Standard dry cutting is the industry standard. Use a sharp, high-TPI carbide blade with a continuous feed rate. Pair this with a high-quality HEPA dust extraction system to manage airborne particles.
Q: Is scoring the panel with a knife before sawing effective?
A: Yes, for highly critical visible seams. Heavily scoring the decorative film with a sharp utility knife directly along the cut line is beneficial. It physically severs the surface tension of the film. This acts as an additional fail-safe against chipping when the saw teeth pass through.
Q: How do you cut holes for electrical outlets in these panels?
A: Use an oscillating multi-tool equipped with a fine-tooth metal or wood blade. You can also use a bi-metal hole saw for round fixtures. Always apply masking tape over the target area first. Plunge the tool slowly to maintain surface integrity and avoid cracking the core.
The company was established in 2018 and specializes in new environmentally friendly indoor decorative materials such as SPC flooring, WPC flooring, carbon crystal flooring, wood veneer panels, and carbon crystal wall panels.