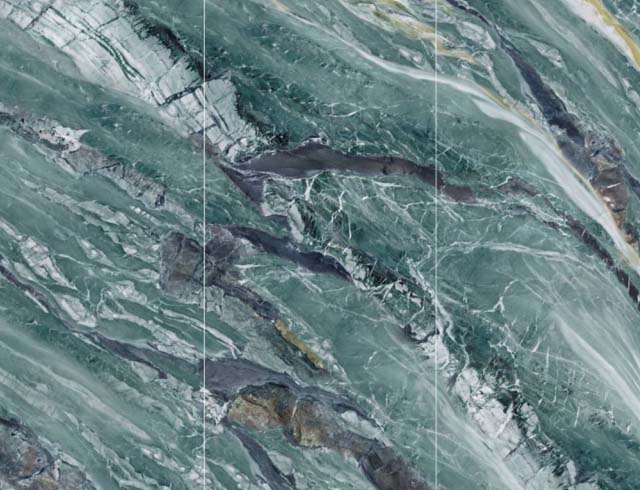
Achieving a monolithic, high-end look using large-format wallcoverings transforms ordinary spaces into stunning architectural showcases. Designers and homeowners alike crave this flawless visual expanse. However, installing these materials perfectly requires advanced planning and technique. You cannot just attach them to a wall and hope for the best.
The primary installation friction point involves unmanaged panel joints. These gaps disrupt the visual flow, particularly when you use continuous pattern designs. Left untreated, seams collect dirt and break the illusion of luxury stone or wood. They also expose the underlying wall to moisture.
This guide provides an evidence-based breakdown of professional seam-hiding techniques. We balance strict aesthetic demands against structural realities like thermal expansion and moisture resistance. You will learn actionable strategies to conceal joints and protect your investment long-term.
Key Takeaways
Architectural Trims: Metal and PVC profiles offer the most durable, scalable solution for hiding gaps while allowing for natural panel expansion.
Color-Matched Epoxies: When an invisible joint is required, specialized sealants and resins provide a flush finish, though they require stable substrates to prevent cracking.
Pattern Continuity: Maximizing the impact of a Continuous Marble Pattern PVC Wall Panel requires precise pre-planning and edge-routing before the panels ever touch the wall.
Acclimation is Critical: 90% of post-installation seam failures (cracking or buckling) are caused by failing to acclimate panels to the room's temperature and humidity prior to mounting.
Understanding Joint Dynamics in Carbon Crystal Wall Panels
Before you attempt to hide a seam, you must understand how wall materials behave. A carbon crystal wall panel typically consists of a PVC-based composite core. Manufacturers engineer this core for durability, but it retains a distinct coefficient of thermal expansion. When room temperatures rise, the material naturally expands. When temperatures drop, it contracts. You cannot stop this physical movement.
Rigidly abutting two panels creates a "butt joint." In theory, a tight butt joint looks seamless. In reality, it inevitably creates micro-gaps as the building settles and temperatures fluctuate. These micro-gaps collect airborne dust. In humid environments, they trap moisture. Visually, a dark vertical line forms between the panels. This line instantly breaks the illusion of natural stone or timber, revealing the installation as synthetic paneling.
To evaluate your installation strategy, you need clear success criteria. A professionally executed seam must achieve the following:
Water Resistance: It must block moisture penetration, especially in kitchens or bathrooms.
Flush Alignment: It should prevent any distinct shadow lines caused by uneven panel heights.
Visual Integration: It must trick the eye into seeing one continuous surface.
Dynamic Flexibility: It has to absorb seasonal wall shifts without cracking the finish.
Solution 1: Architectural Metal and PVC Trims (High Durability)
Architectural trims provide the most reliable method for managing seams. This mechanism uses physical profiles like T-molding, H-channels, or edge-caps to bridge the gap between adjacent panels. Installers insert the panel edges into the trim channels during mounting.
This approach offers significant advantages. Primarily, it allows internal room for thermal expansion. The panels can safely expand inside the channel without surface buckling. Furthermore, trims effectively hide uneven cuts and minor substrate imperfections. You do not need absolute perfection when cutting the boards. This makes trim systems highly scalable for large commercial installations where speed matters.
However, this method carries distinct aesthetic drawbacks. It introduces a visible grid pattern across your wall. If you want a perfectly smooth surface, trims interrupt continuous graphic flows. The eye naturally catches the metallic or colored dividers.
We recommend architectural trims for specific environments. They excel in commercial spaces, high-traffic corridors, and modern designs. In these settings, metallic accents like brushed brass or matte black T-bars actually complement the aesthetic. They turn a structural necessity into a bold design choice.
Solution 2: Color-Matched Sealants and Epoxy Resins (The "Invisible" Look)
Many luxury designs demand zero visible dividers. For this, you must rely on color-matched sealants or epoxy resins. This mechanism involves filling the seam directly. You inject a flexible caulk, color-matched silicone, or rigid epoxy into the gap, followed by careful leveling.
Implementation requires strict adherence to professional rules. First, you must apply premium masking tape to both panel edges. This prevents the resin or silicone from bleeding into the panel's micro-texture. Once resin cures inside a textured surface, you cannot remove it. Second, match your material to the environment. Use flexible caulks for dry areas prone to seasonal shifts. Use marine-grade epoxies for wet zones, such as shower enclosures.
When executed correctly, this creates the closest possible approximation of a seamless Continuous Marble Pattern PVC Wall Panel. The visual continuity remains breathtaking. Guests will struggle to locate the individual joints.
Despite the stunning results, you face notable risks. Rigid epoxies are prone to hairline cracking if the drywall substrate flexes. If you fail to glue the panels down completely, normal wall vibration will pop the seam filler out over time.
Solution 3: Precision Edge Routing and V-Grooving (Advanced Technique)
Sometimes, hiding a seam means embracing it. Precision edge routing utilizes professional tools to bevel or V-groove the edges of the panels prior to installation. Instead of attempting to fake a perfectly flat seam, you create a deliberate architectural shadow line, also known as a reveal.
This mechanism fundamentally changes the design logic. It turns a potential flaw into a high-end design feature. Shadow lines look intentional and bespoke. Furthermore, this method remains highly stable over time. You completely avoid the mess of liquid sealants and the visual grid of metal trims.
The implementation reality is strict. You cannot attempt this with basic hand tools.
Advanced Tooling: You need high-speed professional routers equipped with specialized composite-cutting bits.
Measurement Tolerances: Every cut must be identical to maintain a consistent shadow gap.
Perfectly Plumb Walls: If the underlying wall bows, the shadow lines will look crooked and unprofessional.
This technique suits luxury residential applications perfectly. It works best when a classic "paneled" look is acceptable, or when you are working with thicker carbon crystal panels that provide enough depth for a substantial groove.
Decision Framework: Evaluating Your Seam Strategy
Choosing the right seam concealment method requires balancing aesthetics against physical demands. We use a feature-to-outcome mapping system to simplify this choice. You should match your core goal to the corresponding structural solution.
Budget and timeline considerations play a massive role. Time is money in construction. Architectural trims reduce overall installation time by up to 30%. You avoid tedious taping, filling, and curing phases. Conversely, custom epoxy color-matching adds significant labor hours. The installer must blend colors on-site to match the exact panel batch.
Below is a summary chart comparing the primary seam concealment methods:
Concealment Strategy
Primary Advantage
Main Limitation
Ideal Application
Metal / PVC Trims
Maximum durability and expansion control
Creates a visible grid pattern
Commercial spaces, high-moisture zones
Color-Matched Epoxy
Nearly invisible, continuous aesthetic
High labor cost, risk of cracking
Luxury residential dry areas
V-Grooving / Reveals
Stable, intentional architectural detail
Requires plumb walls and advanced tools
Thicker panels, modern paneled walls
Before shortlisting your next steps, you must assess substrate flatness. Grab a 10-foot straight edge. Place it against your drywall. The surface must be within 1/8 inch of flat over 10 feet if you want a seamless epoxy finish. If the wall bows beyond this, you must select an architectural trim installation kit instead.
Even the best strategy fails if basic installation principles are ignored. Professional contractors see the same mistakes repeatedly. Understanding these pitfalls saves you from costly tear-outs.
Skipping material acclimation remains the deadliest error. Panels stored in a cold warehouse will expand violently when installed in a heated living room. If you install them cold, they will expand as soon as the HVAC is turned on. This thermal expansion physically crushes the seam filler. In severe cases, it causes the entire panel to buckle off the wall.
Inadequate substrate preparation ranks closely behind. Applying heavy panels over uneven drywall creates "bridging" at the seams. The panel hovers slightly over a dip in the wall. When someone leans against that seam, the physical pressure pushes it inward. This sudden flexing causes epoxy seams to pop and trims to detach.
Finally, incorrect adhesive usage destroys joint integrity. Installers often grab whatever construction adhesive they have on hand. Using rigid, brittle adhesives instead of flexible polymers is a mistake. Rigid glues transfer all structural wall movement directly to the seams. You must use flexible, high-grab polymers designed for PVC composites to ensure immediate and lasting stability.
Conclusion
Hiding seams effectively is an exercise in balancing aesthetic desires and material physics. You cannot ignore thermal expansion, but you do not have to sacrifice your design vision. Proper planning dictates the success of your installation.
While color-matched epoxies offer the best visual continuity, metal architectural trims provide the safest, most durable long-term outcome. Precision edge routing offers a brilliant middle ground for those with the tools and expertise.
As a next-step action, we advise readers to review their specific product's technical data sheet for approved seam treatments. Do this before making any final purchases. Secure the correct trim kits, sealants, and flexible adhesives prior to beginning your installation to ensure a flawless, enduring finish.
FAQ
Q: Can I use standard wood filler on carbon crystal wall panels?
A: No. Wood filler lacks the flexibility and adhesion required for PVC-based carbon crystal surfaces and will easily crack and fall out.
Q: How do I waterproof seams in a shower installation?
A: Use an anodized aluminum H-channel packed with mold-resistant, 100% silicone sealant before inserting the panels.
Q: What if my wall isn't perfectly flat?
A: You must shim the wall or use a heavy-duty leveling adhesive to ensure panel edges meet perfectly flush. Uneven walls make seamless epoxy finishes impossible.
Q: Will sanding the seam damage the continuous marble pattern?
A: Yes. The surface film of a Continuous Marble Pattern PVC Wall Panel is thin. Sanding will destroy the printed layer and the protective UV coating, leaving a dull, irreparable patch. Excess sealant must be removed chemically or peeled while wet.
The company was established in 2018 and specializes in new environmentally friendly indoor decorative materials such as SPC flooring, WPC flooring, carbon crystal flooring, wood veneer panels, and carbon crystal wall panels.