Deciding to upgrade a room often hinges on installation complexity, unexpected delays, and timeline predictability. Homeowners and contractors alike need clear expectations before committing to new architectural materials. This guide provides a realistic, contractor-grade look at what you need to successfully install a stunning feature wall. We bypass the marketing fluff to show you the actual mechanics of the job. Proper installation requires specific wall preparation, correct structural adhesives, and exact cutting tools. Understanding these hard realities upfront prevents frustrating material waste. It also ensures the long-term structural integrity of your interior spaces. You will learn how to assess your existing walls, select the right specialized tools, and master the mounting process step-by-step. Let's dive into the core requirements for achieving a flawless, professional-grade finish.
Key Takeaways
Surface Preparation is Critical: Walls must be structurally sound, dry, and leveled within a strict tolerance before application.
Specialized Materials Exist: Variations like the PVC mirror bamboo charcoal wall board require specific handling to prevent surface marring.
Adhesive over Mechanical Fastening: Most installations rely on high-grab structural construction adhesive rather than nails, demanding precise initial placement.
Risk Mitigation: Factoring in a 10-15% material overage for complex cuts (outlets, corners) is essential for accurate project budgeting.
Assessing Project Feasibility: Is Your Space Ready?
Before purchasing materials, you must evaluate your installation environment. Certain spaces represent ideal scenarios for architectural upgrades. Think of commercial lobbies, residential feature walls, and dedicated media rooms. These areas typically offer stable climate control. Conversely, you should avoid high-risk environments. Direct wet zones inside showers or outdoor facades require specialized sealing protocols. Standard indoor panels will fail if exposed to constant running water.
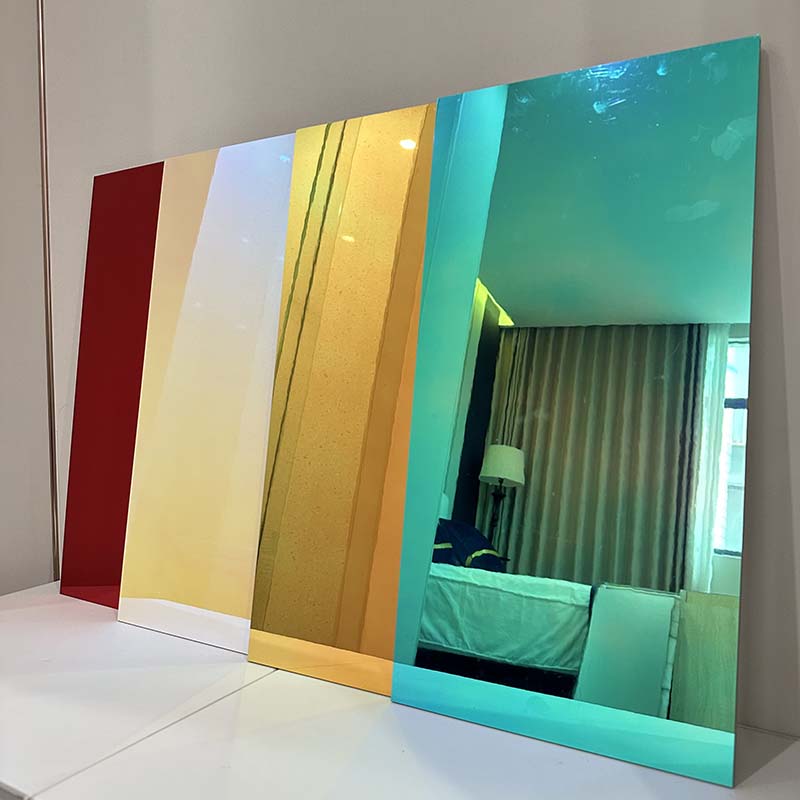
You must also evaluate your specific material choices. Standard matte finishes hide minor wall imperfections reasonably well. Specialty options demand a much stricter environment. For example, a PVC Mirror Bamboo Charcoal Wall Board requires near-perfect wall flatness. A mirror finish reflects light aggressively. Any underlying bump or dip creates severe optical distortion. You must scrutinize the substrate carefully before mounting reflective materials.
Substrate condition dictates the entire success of your project. You can apply these panels over bare drywall, sturdy plywood, or existing flat tile. However, several dealbreakers exist. Flaking paint is an immediate red flag. The adhesive will bond to the paint, but the paint will tear away from the wall. Heavy drywall texture also reduces the adhesive contact area. High moisture content inside the drywall prevents proper curing. Your ultimate success criterion is simple. The substrate must bear the physical weight of the boards and chemically accept the structural adhesives.
Substrate Feasibility Chart
Substrate Type
Feasibility Status
Required Preparation
New Drywall (Unpainted)
Highly Ideal
Wipe away joint compound dust. Prime if heavily porous.
Existing Flat Tile
Acceptable
Degloss the surface. Clean grout lines thoroughly.
Heavy "Popcorn" Texture
Dealbreaker
Sand flat or skim coat completely before installation.
Peeling Wallpaper
Dealbreaker
Strip wallpaper completely. Remove all residual paste.
Pre-Installation Checklist: Essential Tools and Prep Work
Investing in the correct tools prevents mid-project delays. Amateur equipment often ruins premium materials. You need professional-grade gear to execute clean cuts and straight lines. Trying to improvise usually leads to chipped veneers and wasted boards. Gather everything before you mix any adhesive or mark your first line.
Cutting Equipment: You need a fine-tooth track saw or a table saw. These tools provide straight, burn-free edges. A standard circular saw often chips the decorative veneer.
Measurement Tools: Accuracy defines the final look. Use a laser level, a reliable measuring tape, and a chalk line. Plumb lines are non-negotiable.
Application Gear: Buy a heavy-duty caulking gun for thick adhesives. You also need heavy-duty suction cups. These are mandatory when moving large format or mirror-finished boards.
Expertise in adhesive selection separates lasting projects from structural failures. Never use standard wood glue. Wood glue requires a porous surface to absorb moisture and cure. Instead, you must specify a polyurethane-based construction adhesive. Many professionals prefer specialized hybrid polymer adhesives. These formulas offer incredible immediate grab. They hold the board vertically while the chemical bond cures fully.
Do not skip the acclimation phase. Architectural boards react to temperature and humidity changes. You must let them sit in the actual installation room for at least 48 hours. Lay them flat on the floor. This allows the core materials to adjust to the local thermal environment. Skipping this step often causes the boards to warp or pop off the wall weeks later.
The Core Installation Framework (Step-by-Step)
Precision matters deeply during the mounting phase. A rushed job shows obvious flaws immediately. Following a strict sequence guarantees a secure, visually stunning outcome. We break down the professional approach into four non-negotiable phases.
Establishing the Baseline: Never trust your floor or ceiling to be perfectly level. Set up your laser level to cast a perfectly vertical line. Starting from the exact center creates visual symmetry. Alternatively, starting from the most highly visible corner dictates a clean flow across the room. Mark this baseline clearly.
Precision Cutting and Dry Fitting: Measure every dimension twice before turning on your saw. Dry fit every piece against the wall before applying glue. When handling cutouts for electrical outlets, drill the corners first. Then use a jigsaw to connect the holes. This prevents the rigid core from cracking under stress.
Adhesive Application Strategy: Load your heavy-duty caulking gun. Apply the adhesive using a continuous "S" pattern across the back. Some installers prefer the perimeter-and-dot method. Do not apply adhesive within two inches of the edge. If you apply it too close, the glue will squeeze out and ruin the decorative face.
Mounting and Interlocking: Press the charcoal wall panel firmly against the wall. Use steady, even pressure across the entire surface. If your product features a tongue-and-groove system, slide the next piece gently into place. Use a tapping block to close the joint completely. If they are butt-jointed, use spacer guidelines to maintain perfectly even microscopic seams.
Best Practice: Always keep a damp microfiber cloth nearby. If adhesive accidentally touches the front veneer, wipe it away immediately. Cured polyurethane adhesive is nearly impossible to remove without scratching the finish.
Navigating Complexities: Corners, Edges, and Seams
Amateur installations usually fail at the transitions. Straight walls are relatively simple. Corners, seams, and floor boundaries test your actual skill level. You must anticipate these implementation risks to achieve a flawless architectural aesthetic.
Handling inside and outside corners requires a specific strategy. The easiest solution involves dedicated trim pieces. Manufacturers sell color-matched metal or PVC corner profiles. You simply slide the cut edges into the channel. It hides imperfections beautifully. Advanced installers might attempt miter-folding techniques. This involves cutting a V-groove into the back of the board, leaving the front veneer intact. You then fold the board around the corner. It creates an incredible seamless edge, but it demands absolute precision.
Managing flat seams also requires immense attention to detail. You must ensure tight seams without overlapping the edges. Even slight variations in wall flatness cause lippage. Lippage occurs when one edge sits higher than its neighbor. To hide microscopic gaps, professionals use color-matched acrylic caulk. Apply a tiny bead, smooth it out, and wipe away the excess instantly.
Never butt the boards tightly against the floor or ceiling. You must leave a 2-3mm expansion gap at both ends. Buildings shift naturally over time. Temperatures fluctuate daily. If you trap the boards tightly, thermal expansion has nowhere to go. The pressure will force the boards to buckle outward. You can easily hide these small expansion gaps later using standard baseboards or crown molding.
Procurement Logic: DIY vs. Professional Installation
Deciding who handles the installation dramatically affects your project timeline. You need a clear framework to evaluate self-installation versus hiring a contractor. Both paths carry distinct advantages and notable risks.
Look closely at your cost versus time return on investment. The DIY route offers lower upfront labor costs. However, it carries a much higher risk of material waste. One bad cut ruins an entire board. You also need existing proficiency with power tools. If you have to buy a track saw and laser level, your savings evaporate quickly. The professional route costs more upfront. In return, you get a predictable finish, strict warranty adherence, and rapid deployment. A seasoned crew finishes a room in one day.
Before placing a bulk order, finalize your actionable next steps. Calculate your total square footage accurately. You must add a standard 10-15% waste factor. Complex rooms with multiple windows or intricate corners require closer to 15%. Finally, audit supplier lead times. Premium architectural materials often ship from overseas. Ensure the delivery schedule aligns perfectly with your overall renovation timeline.
Table: DIY vs. Professional Installation Comparison
If you choose to hire out, ensure the contractor has handled this specific material before. A standard drywall crew might lack the finesse needed for a Charcoal Wall Panel finish. Ask for a portfolio of recent accent wall projects.
Conclusion
A flawless interior upgrade transforms how a space feels and functions. These architectural panels deliver an undeniable high-end finish. However, their ultimate success relies entirely on rigorous surface preparation. You cannot skip leveling the substrate. You cannot ignore proper adhesive selection. Precision cuts and careful expansion gaps define the boundary between amateur attempts and professional results.
Assess your existing walls for structural integrity and flatness before ordering.
Invest in the correct tools, specifically a track saw and specialized construction adhesive.
Always order 10-15% extra material to account for complex cuts and inevitable mistakes.
Order sample boxes today to test cutability and verify the finish under your actual room lighting.
FAQ
Q: Can charcoal wall panels be installed directly over existing tile or wallpaper?
A: Yes for tile, no for wallpaper. You can mount over tile if the surface is completely flat and deglossed. However, you must never install over textured or peeling wallpaper. The adhesive will rip the paper off, causing the entire structure to fail. Always strip wallpaper completely.
Q: How do you cut a PVC mirror bamboo charcoal wall board without cracking the finish?
A: Place a strip of high-quality masking tape directly over your cut line. Use a track saw equipped with a high-tooth-count blade designed for plastics. Cut slowly and let the blade do the work. Do not force the saw through the material.
Q: Are these panels removable later without damaging the drywall?
A: Generally, no. We rely on high-grab construction adhesives for safety and stability. When you remove them in the future, the adhesive will likely tear the drywall paper layer. You should expect to skim-coat or replace the underlying drywall after removal.
Q: What is the best way to clean the panels post-installation?
A: Maintenance is simple. Use only non-abrasive cleaners and a soft microfiber cloth. Wipe away dust gently. Never use harsh chemical solvents, bleach, or abrasive scrubbing pads. These will permanently dull the finish or scratch the delicate outer veneer.
The company was established in 2018 and specializes in new environmentally friendly indoor decorative materials such as SPC flooring, WPC flooring, carbon crystal flooring, wood veneer panels, and carbon crystal wall panels.