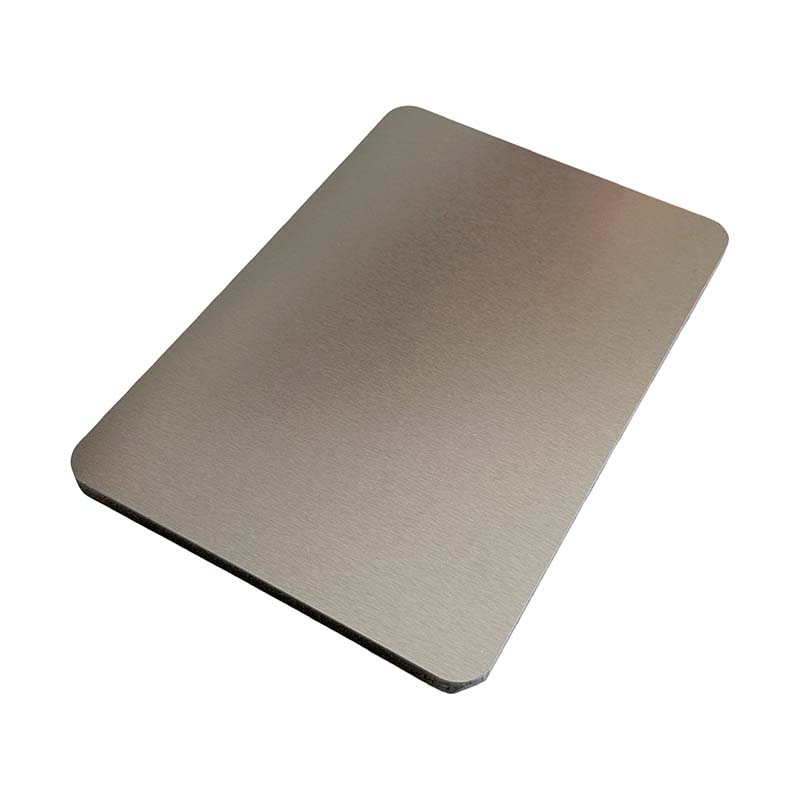
Interior design is evolving quickly. Homeowners and architects now seek seamless material transitions across every surface. You might naturally wonder if you can successfully install carbon crystal panels on ceilings to achieve this striking unified look. Transitioning any dense material from a wall to an overhead surface presents unique gravity and structural challenges. Modern continuous material applications demand durable, low-maintenance overhead materials capable of resisting moisture and sagging. However, properly securing these robust boards overhead requires strict adherence to load-bearing assessments and specialized fastening techniques compared to simple vertical wall applications. Today, we will explore exactly how to evaluate your space for overhead panel installations safely. You will learn the specific mechanical fastening requirements needed to prevent structural failure. Finally, we will compare their unique performance benefits against standard drywall and acoustic tiles in high-humidity environments.
Key Takeaways
Feasibility: Carbon crystal panels are viable for ceilings when installed over a secure, load-bearing substrate.
Installation Mandate: Gravity demands a dual-fastening approach—relying solely on adhesive is a critical failure risk; mechanical fasteners (screws/brad nails) anchored to joists are mandatory.
Performance Edge: Their inherent moisture-proof, waterproof, and fire-proof properties make them superior to standard drywall in bathrooms, kitchens, and basements.
Design Continuity: Premium variants, such as the Gold Metal Carbon Crystal WPC Wall Panel, allow for high-end, cohesive architectural designs across both vertical and horizontal planes.
Evaluating Carbon Crystal Panels for Ceiling Use: Core Advantages
Traditional ceiling materials often fail prematurely when exposed to challenging indoor climates. A standard gypsum board absorbs ambient dampness. It expands, loses structural integrity, and eventually sags. Upgrading to a carbon crystal panel solves many of these chronic environmental challenges.
Moisture and Humidity Resistance
Modern homes frequently feature high-humidity zones. Kitchens, indoor pool rooms, and bathrooms generate heavy condensation. Unlike traditional drywall, the carbon crystal composition blocks moisture penetration completely. The material prevents warping, mold growth, and unsightly sagging. You avoid the spongy degradation common in damp basements. Its hydrophobic surface means water beads up rather than soaking in. This structural stability keeps overhead surfaces flat and secure for decades.
Fire Retardancy
Safety remains a paramount concern for overhead building materials. These advanced panels possess inherent fire-proof properties. Most premium products achieve strict B1 or A-level fire compliance. B1 certification indicates the material is highly flame retardant. It will not easily ignite. If a fire occurs, the panel stops burning once you remove the flame source. This high safety threshold meets strict residential and commercial building codes perfectly. You gain peace of mind installing them above high-heat areas like commercial kitchens.
Longevity and Maintenance
Homeowners despise constant ceiling upkeep. Repainting overhead drywall is physically exhausting. It often requires moving heavy furniture and laying extensive drop cloths. Carbon crystal solutions require minimal upkeep over their lifespan. The dense, non-porous surface naturally resists staining from smoke, cooking oils, or dust. You do not need periodic repainting, patching, or mudding. A simple wipe down using a microfiber mop keeps the ceiling looking brand new. They resist accidental impact damage much better than fragile acoustic tiles.
Acknowledging the Limitations: Weight and Structural Considerations
Every building material carries specific physical limitations. Installing dense composite boards overhead introduces structural variables you must carefully manage. Proper preparation guarantees long-term safety.
The Gravity Factor
We must frame the primary disadvantage transparently. Carbon crystal boards are noticeably denser and heavier than basic PVC ceiling tiles or thin drywall panels. Gravity constantly pulls down on overhead installations. This physical reality makes secure fastening absolutely critical. A standard lightweight suspended tile barely stresses the framing. Conversely, a dense composite board applies a constant dead load. You cannot ignore this added weight during the design phase.
Substrate Requirements
Installing directly over damaged or compromised ceilings presents a critical risk. Weak, water-damaged drywall will tear away under the added load. The underlying joists or structural furring strips must capably support the continuous dead load of the new panels. Never anchor heavy boards into unsupported sheetrock. Installers must locate solid wood or metal framing members. We recommend conducting a thorough structural inspection before ordering materials. You might need to install supplementary structural battens if your current framing lacks sufficient anchor points.
Thermal Expansion Adjustments
All building materials expand and contract slightly as room temperatures change. Carbon crystal boards are highly stable, but they still require proper expansion gaps. You must leave a small perimeter gap where the ceiling meets the walls. We typically recommend leaving a 1/4-inch space around the entire room edges. This gap prevents the boards from buckling or warping during extreme seasonal temperature fluctuations. Matching crown molding or perimeter trim easily conceals these necessary functional gaps.
Step-by-Step Ceiling Installation Protocol (The Dual-Fastening Method)
Gravity demands a rigorous, disciplined installation approach. We strictly mandate the dual-fastening method. This combines chemical bonding with heavy-duty mechanical securing. Follow these precise phases to guarantee a safe, flawless overhead result.
Phase 1: Substrate Preparation and Mapping
Careful preparation dictates the success of your entire project. An uneven ceiling will cause the interlocking joints to misalign quickly.
Locate and mark all existing ceiling joists using a high-quality stud finder.
Snap chalk lines across the ceiling to map out every solid anchor point clearly.
Clean the entire surface thoroughly. Ensure it remains flat, dry, and entirely dust-free.
Install a wooden batten framework across the ceiling if the existing surface is uneven or severely damaged.
Space your new wooden battens precisely 12 to 16 inches apart to provide optimal support.
Phase 2: Material Application
Chemical bonding provides continuous surface support. It prevents the center of the board from drooping away from the joists over time.
Select a high-tack structural construction adhesive. Polyurethane or silicone-based options work best.
Apply the adhesive generously to the back of the board.
Use a serpentine or zigzag pattern to ensure widespread coverage across the entire panel back.
Keep the adhesive beads roughly two inches away from the board edges to prevent messy squeeze-out during compression.
Phase 3: Mechanical Securing
This phase is non-negotiable for safety. Chemical adhesive alone will eventually fail under constant gravitational pull.
Lift the prepared board into place against the ceiling map lines.
Drive pneumatic brad nails or concealed screws directly through the panel's interlocking tongue-and-groove edges.
Anchor every fastener deeply into the marked wooden joists or battens.
Space your mechanical fasteners evenly, placing one every 12 to 16 inches along the supporting framing.
Implementation Warning: Never rely on adhesive alone for overhead installations. Temperature shifts and gravity will inevitably cause adhesive-only installations to detach and crash down.
Phase 4: Joint and Edge Finishing
Professional finishing touches elevate the visual appeal and hide functional expansion spaces.
Connect subsequent panels by carefully tapping the groove over the secured tongue.
Utilize matching trim profiles, such as H-channels or edge caps, to secure visible seams tightly.
Install perimeter molding to cleverly conceal the required thermal expansion gaps at the wall edges.
Wipe away any accidental adhesive smudges immediately using an approved solvent before it cures completely.
Material Selection and Aesthetic Integration
Switching from basic white drywall to advanced composite panels opens up exciting architectural possibilities. You can dramatically transform the spatial perception of any room.
Matching Wall and Ceiling Textures
Interior design increasingly favors monolithic material applications. Wrapping a room in a single, continuous material creates a seamless, ultra-modern aesthetic. It blurs the harsh lines between vertical and horizontal planes. This technique makes spaces feel remarkably larger and more cohesive. Using a matching Carbon Crystal Panel on both the walls and the ceiling establishes a luxurious, high-end hotel ambiance. You achieve a customized architectural look without the exorbitant cost of custom millwork.
Highlighting Premium Finishes
Not all composite boards look identical. Premium variants offer stunning visual upgrades. Consider specific high-end options like the Gold Metal Carbon Crystal WPC Wall Panel. This remarkable product features a robust wood-plastic composite backing for superior structural rigidity. Its brilliant metallic face interacts beautifully with overhead lighting. Recessed lights and crystal chandeliers reflect off the subtle metallic accents. This interaction scatters warm, diffused light throughout the room. It instantly elevates commercial lobbies, boutique retail stores, or luxury residential spaces.
Lighting Integration
Upgrading your ceiling material requires planning for electrical fixtures. You will need to accommodate existing recessed lights, HVAC vents, and smoke detectors. Fortunately, these boards are highly workable. You can cut them cleanly using standard woodworking tools. We recommend using a fine-tooth hole saw for circular recessed light openings. Always ensure proper heat dissipation clearances around older incandescent fixtures. Modern LED slim lights pair perfectly with these boards since they generate minimal heat.
Carbon Crystal Panels vs. Traditional Ceiling Materials
Understanding how these advanced panels stack up against older materials helps justify the investment. Each material category possesses distinct installation and performance characteristics.
Versus Drywall (Gypsum)
Standard drywall requires a massive amount of labor. It demands heavy lifting, screwing, taping, multiple coats of mudding, and extensive sanding. The resulting dust infiltrates the entire house. Carbon crystal installations completely bypass this messy phase. You lock them in place, and the finish is immediately perfect. Furthermore, gypsum crumbles and grows toxic black mold when exposed to plumbing leaks. Our advanced panels remain entirely unaffected by topical water exposure.
Versus PVC Ceiling Panels
Basic hollow-core PVC panels are cheap and entirely waterproof. However, they lack significant structural rigidity. They often look like cheap plastic and can dent easily upon impact. Carbon crystal boards offer immense structural strength. They will not warp or wave between joists. Additionally, dense carbon panels provide significantly better sound dampening properties. They block impact noise from the floor above much better than thin, hollow PVC profiles.
Versus Drop Ceilings (Acoustic Tiles)
Acoustic drop ceilings utilize a suspended metal grid. They offer easy access to plumbing and wiring. Unfortunately, they look highly institutional and dated. They also steal precious vertical room height. A direct-mount carbon crystal installation saves critical vertical space. It maximizes your ceiling height while delivering a massive aesthetic upgrade. You swap a cheap, dusty office look for a sleek, modern architectural finish.
Ceiling Material Performance Comparison Chart
Material Type
Moisture Resistance
Installation Speed
Aesthetic Quality
Vertical Space Impact
Carbon Crystal Panel
Excellent (100% Waterproof)
Fast (No mudding/sanding)
Premium / Luxurious
Minimal (Direct Mount)
Drywall (Gypsum)
Poor (Prone to mold)
Slow (Requires mud/tape)
Basic / Standard
Minimal (Direct Mount)
Hollow PVC Panels
Excellent
Fast
Low / Plastic appearance
Minimal (Direct Mount)
Acoustic Drop Tiles
Moderate (Can stain/sag)
Moderate (Grid setup needed)
Institutional / Dated
High (Loses 4-6 inches)
Conclusion
A carbon crystal panel proves to be an excellent, exceptionally durable ceiling material. It succeeds brilliantly when you install it with strict structural integrity in mind. By relying on a strict dual-fastening method, you eliminate the risks associated with gravity and heavy materials. You gain a stunning, moisture-proof overhead surface capable of lasting decades without repainting.
Assess your current ceiling structure today to determine if the joists can support direct mounting. Consult a qualified local installer regarding your specific load-bearing capacity and framing layout. Finally, request material samples to test how different metallic and matte finishes interact with your specific overhead room lighting.
FAQ
Q: Can I install carbon crystal panels directly over an existing popcorn ceiling?
A: No. The surface must be scraped entirely flat first. Alternatively, you must install a wooden furring strip grid directly over the popcorn texture. This grid provides a clean, secure anchor point for your mechanical fasteners and adhesive.
Q: Will a carbon crystal panel sag over time on a ceiling?
A: Not if properly secured. You must use mechanical fasteners every 12-16 inches directly along the wooden joists. Sagging only occurs from improper adhesive-only installations that fail under constant gravitational pull.
Q: How do I cut these panels for ceiling vents and recessed lights?
A: Use a fine-tooth circular saw, jigsaw, or a standard hole saw. The dense composite material cuts cleanly and precisely. It will not crumble, snap, or produce excessive dust like traditional drywall does.
Q: Are they safe to use above a kitchen stove or shower?
A: Yes, absolutely. Their inherent waterproof and B1 fire-retardant properties make them highly suitable for these high-stress zones. They easily withstand steam, grease, and high humidity without warping or growing mold.
The company was established in 2018 and specializes in new environmentally friendly indoor decorative materials such as SPC flooring, WPC flooring, carbon crystal flooring, wood veneer panels, and carbon crystal wall panels.