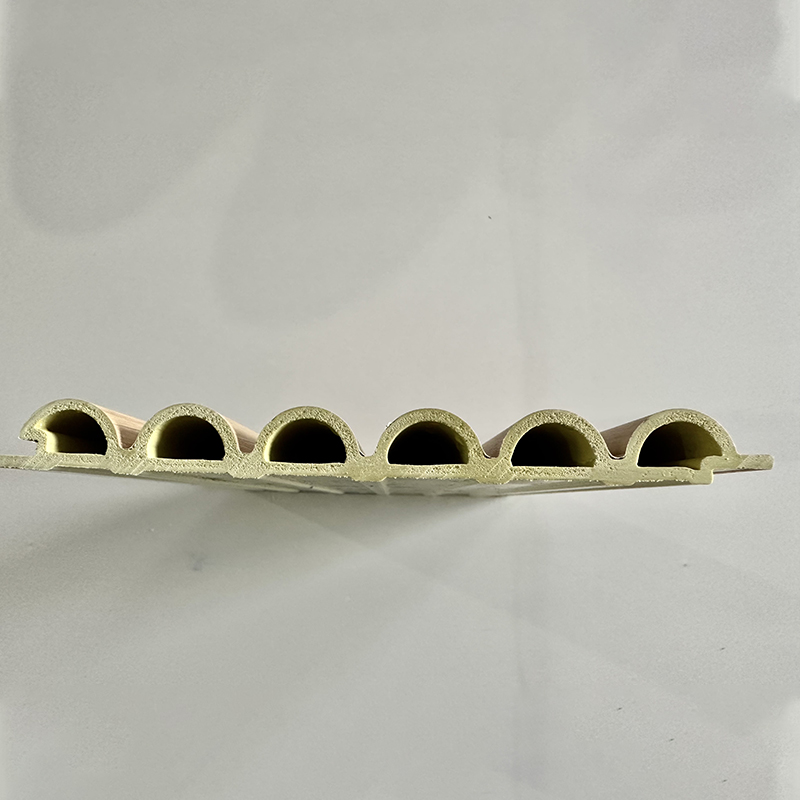
Finishing curved walls seamlessly presents a notoriously difficult architectural challenge. Traditional materials often crack under pressure or require excessive labor to shape correctly. Modern composite materials offer a streamlined, highly effective alternative to these outdated methods.
This guide serves as a definitive, contractor-grade blueprint. You will learn to install flexible composites on concave and convex surfaces seamlessly. It ensures you maintain structural integrity and a flawless aesthetic finish without standard project delays.
We rely on verifiable material tolerances and professional-grade adhesive protocols for these techniques. You must adhere to established substrate preparation standards to guarantee long-lasting performance. Mastering these steps empowers you to execute complex installations with supreme confidence.
Key Takeaways
Minimum bending radiuses depend strictly on panel thickness and core density; exceeding these limits requires specialized back-grooving.
High-tack polyurethane (PU) structural adhesives, paired with temporary mechanical bracing, are mandatory for curved applications to prevent spring-back.
Surface preparation is non-negotiable: the substrate must be fully cured, plumb, and free of particulates to ensure uniform adhesion along the radius.
Specific finishes, such as a Waterproof Fireproof PET Metal Fluted Panel, require tailored edge-sealing techniques to maintain compliance ratings after installation.
Navigating Material Tolerances on Curved Surfaces
Standard rigid panels snap under tension. They cause major project delays. You end up wasting expensive materials. The resulting aesthetics look terrible on curves. You need a modern solution tailored specifically for architectural flexibility. Architects and contractors constantly seek better building materials for dynamic spaces.
Evaluating material construction proves vital. The bamboo charcoal panel offers a unique co-extruded core. It delivers immense tensile strength. It also provides the necessary flexibility for curved walls. You can bend it safely without fracturing the internal structure. This dual-action capability saves labor hours on complex job sites.
Different surface laminates react uniquely to tension. Standard flat films bend easily around wide radiuses. Conversely, a Waterproof Fireproof PET Metal Fluted Panel features distinct physical properties. Metallic and fluted textures have stricter flexibility thresholds. They present higher risks of visual distortion when bent aggressively. You must evaluate the surface finish before committing to a radius. Extreme curves easily distort metallic reflections.
We measure success through strict criteria. A successful installation results in zero delamination over time. You will see no visible micro-cracking on the veneer. The final product achieves total conformity to the radius of the wall. Achieving these criteria guarantees a premium aesthetic finish.
Substrate Preparation and Radius Assessment
You must accurately measure the curve first. Calculate the exact radius (R) of the wall before beginning. Measure the arc length and the chord depth. This math determines your installation approach. It tells you if cold-bending remains viable. If the radius feels too tight, you require mechanical modification. Accurate math prevents accidental material destruction during installation.
Evaluate the backing wall thoroughly. Drywall requires a level 4 finish minimum. Plywood needs secure framing behind it. Cement board demands a smooth skim coat. The substrate must hold immense outward tension. Weak backing materials fail under the spring-back force. You must guarantee structural integrity first.
High moisture content creates massive risks. It negatively affects adhesive cure times on high-tension curves. Wet substrates cause polyurethane adhesives to fail completely. You must verify moisture levels using a digital meter. The table below outlines maximum allowable moisture thresholds for common backing materials.
Substrate Material
Maximum Moisture Level
Preparation Requirement
Plywood / OSB
Under 9%
Sand lightly, remove dust, ensure screws are flush.
Standard Drywall
Under 12%
Prime with a high-adhesion sealing primer. Let dry.
Cement Board
Under 8%
Skim coat rough patches. Wipe down with damp cloth.
Always verify compliance standards. Ensure the backing material matches the required fire ratings. Commercial spaces demand strict adherence to building codes. Combining a fire-rated panel over non-compliant plywood voids the overall safety rating. You must maintain cohesive safety standards across all material layers.
Essential Tools and Adhesive Selection
Standard construction mastics fail on curved walls. They cannot resist the immediate spring-back tension. The material naturally wants to return flat. We strongly recommend high-grab polyurethane (PU) structural adhesives. You must pair them alongside double-sided acrylic foam tape. The foam tape provides an instant hold. The PU adhesive cures slowly to form a permanent, unbreakable bond.
You need professional-grade equipment for precise modifications. Basic utility knives perform poorly on dense composites. Cutting and modifying require the following specialized tools:
Plunge router equipped with a 90-degree V-groove bit.
Heavy-duty track saw for perfectly straight cross-cuts.
Cross-line laser level for establishing true plumb lines.
Digital caliper for measuring groove depth accurately.
Industrial suction cups for safe material handling.
Proper bracing equipment acts as a temporary anchor. You cannot hold the material by hand during the curing phase. Ratcheting straps work perfectly for wrapping freestanding columns. Flexible MDF bracing templates help secure concave inward curves. Pneumatic props hold the Bamboo Charcoal Panel firmly in place while the adhesive fully sets. Do not skip this crucial mechanical bracing step.
Step-by-Step Installation Process for Curved Walls
Curved installations demand a strict order of operations. Deviating from these phases causes catastrophic adhesion failures. Follow these steps meticulously for flawless results.
Phase 1: Dry Fitting and Acclimation
Never install materials immediately upon delivery. They require a dedicated acclimation period. Leave the panels flat in the installation room for 48 hours. Ensure the HVAC system runs at a normal operating temperature. This process optimizes the flexibility of the core. Cold composites become brittle and snap easily during tension testing. Always conduct a dry fit against the wall without adhesive first. Mark your alignment edges using painter's tape.
Phase 2: The Back-Grooving Technique
Tight radiuses require strategic mechanical modification. You must use the back-grooving technique. Map vertical lines evenly across the back. Route V-grooves directly into the core. You must never pierce the front veneer. Leave approximately 1.5mm of material remaining at the face.
Spacing dictates your flexibility threshold. Tighter curves require grooves spaced closer together. We typically space grooves every two inches for moderate curves. A sharp, tight column wrap might require grooves every single inch. Test your spacing on a scrap piece first. Validate the flexibility before routing the entire finished sheet.
Phase 3: Adhesive Application
Apply your adhesive strategically. Do not smear it randomly. Run a continuous serpentine bead of polyurethane adhesive down the center lines. Leave distinct gaps between these zig-zag patterns. Apply strips of double-sided acrylic structural tape in these gaps. Place a solid perimeter border of tape around all four outer edges.
This hybrid framework guarantees success. The tape grabs the wall instantly upon contact. It holds the heavy material steady. The polyurethane cures over 24 hours. The PU handles long-term environmental expansion. Never apply tape over dust. Wipe the back thoroughly before application.
Phase 4: Mounting and Bracing
Mounting requires two installers minimum. Start at the most securely anchored flat point of the wall. Press the starting edge firmly into place. Ensure the laser level confirms your vertical plumb. Slowly roll the material directly into the curve. Apply heavy, consistent hand pressure as you move.
You must actively manage the spring-back tension. Once rolled fully into position, apply your bracing equipment immediately. Lock the ratcheting straps or set the pneumatic props. Leave all mechanical bracing attached for a minimum of 24 hours. Early removal guarantees catastrophic delamination.
Quality Control and Post-Installation Maintenance
Quality control begins the next day. You must conduct comprehensive integrity testing. Wait exactly 24 hours post-installation. Remove your mechanical bracing slowly. Inspect the entire radius carefully. Tap the surface gently using your knuckles. Listen closely for hollow sounds.
Hollow spots indicate isolated adhesive failure. The panel pulled away from the wall during curing. You must fix these voids immediately. Inject small amounts of specialized cyanoacrylate adhesive behind the veneer if minor lifting occurs. Major hollow zones require complete panel replacement.
Maintaining compliance ratings requires precision sealing. Fireproof and waterproof ratings apply only to the unbroken face. You expose the core when cutting panels to size. You must seal all cut edges thoroughly. Use a fire-rated silicone sealant along vertical seams. This blocks moisture intrusion. It prevents oxygen from feeding potential core fires. Your local building inspector checks these seams rigorously.
Edge banding finishes the look perfectly. Curved top and bottom edges look raw if left exposed. Do not use bulky metal transition strips. They refuse to bend smoothly. Use matching flexible edge-banding tape instead. Apply it using a controlled heat gun. Trim the excess carefully using a flush-cut trimmer. It provides a seamless, architectural finish.
Evaluating Suppliers and Procurement Next Steps
Choosing the right manufacturer dictates project success. Procurement managers must evaluate suppliers carefully. Look for verifiable ISO certifications. Request independent laboratory testing for fire-retardant capabilities. Core density consistency remains paramount. Inconsistent density causes uneven bending radiuses. You will experience unexpected snapping on site if the core lacks uniformity.
Never place a bulk order blindly. Always conduct physical sample testing first. Order raw, uncut samples directly to the job site. Perform manual bend tests. See how the specific laminate reacts under severe tension. Observe if the surface finish turns white from stress. Field testing exposes inferior manufacturing instantly. It saves thousands of dollars in wasted materials.
Take direct action on your specific blueprints. Consult directly with the technical sales team of your chosen manufacturer. Provide them with your architectural drawings. Ask their engineers to verify radius compatibility. Let the experts confirm if your chosen texture handles the specified curvature. Proper consultation eliminates costly guesswork entirely.
Conclusion
Mastering curved installations drastically reduces standard labor hours.
You deliver a premium, fully compliant architectural finish every time.
Success relies entirely on adhering to established radius limitations strictly.
Employ precise back-grooving techniques for tight, challenging architectural radiuses.
Review your upcoming project specifications carefully. Do not leave curved finishes to chance. Download a detailed technical spec sheet from a verified manufacturer today. Request a physical material sample for immediate on-site tension testing. Contact a dedicated engineering representative for a custom project consultation right now.
FAQ
Q: What is the minimum bending radius for a standard bamboo charcoal panel without back-grooving?
A: The minimum cold-bending radius depends on total thickness. A standard 5mm panel typically handles a bending radius of 1200mm comfortably without modification. Thicker panels snap at this radius. You must back-groove anything thicker than 8mm to achieve similar curves. Always test a small offcut before bending full sheets.
Q: Can I install a Waterproof Fireproof PET Metal Fluted Panel on a concave wall using the exact same method?
A: No. Fluted panels compress differently on concave curves. The metallic finish easily distorts under inward compression. You cannot back-groove a fluted panel deeply without compromising the front ridges. You must use specialized relief cuts on the back. Always follow the manufacturer's specific guidelines for heavily textured finishes.
Q: What type of adhesive prevents the panel from popping off a curved wall during temperature fluctuations?
A: High-tack polyurethane (PU) structural adhesive works best. It remains slightly elastomeric after fully curing. This flexibility absorbs natural thermal expansion and contraction perfectly. Standard rigid construction adhesives crack under thermal stress. Always pair the PU adhesive with double-sided acrylic foam tape for immediate mechanical hold.
Q: Does modifying the back of the panel with V-grooves void its fireproof or waterproof warranty?
A: Modifying the core generally does not void the warranty if the front veneer remains totally intact. However, penetrating the front film instantly compromises the waterproof seal. You must seal all exposed outside edges with fire-rated silicone. Always verify exact warranty stipulations directly with your manufacturer before routing.
Q: How do I seamlessly join two panels in the middle of a continuous curve?
A: You must create a perfectly flush butt joint. Route the meeting edges at a slight back-angle. Apply polyurethane adhesive tightly behind the seam. Run a strip of painter's tape across the front joint to hold them flush. Never use standard H-channel trims on tight curves; they buckle under tension.
The company was established in 2018 and specializes in new environmentally friendly indoor decorative materials such as SPC flooring, WPC flooring, carbon crystal flooring, wood veneer panels, and carbon crystal wall panels.